The Most Common Banner Stand Assemblies
By Colton LaSota
Table of Contents
- Introduction
- Retractor Banner Stand
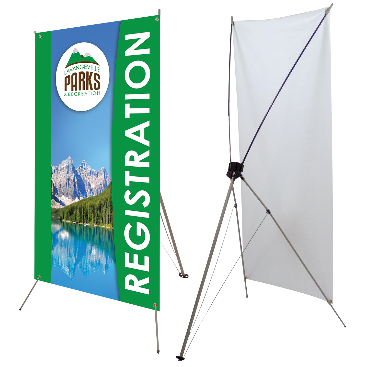
- X-Frame Banner Stand
- Versatile Banner Stand
- Lind Banner Frame
- Conclusion
 Introduction
Videos make excellent guides for completing projects, but sometimes a simple step-by-step textual breakdown is more helpful.
There are two main types of banner stands: retractable and X-Frame. Both banner stands include a carrying case and all the necessary hardware. Retractable banner stands are easy to set up and take down, and X-Frame banner displays are more versatile and can be used in a variety of settings.
Print out the assembly instructions and use them as a checklist or simply bookmark this resource page. Let’s get started!
Retractor
Part One: Frame
-
Remove the retractor from its bag.
-
Extend the feet from the tube.
-
Place the banner stand on a flat floor.
-
Extend the vertical bar upwards.
Part Two: Banner
-
Find the top of the banner in the tube.
-
Extend the banner upwards to the top of the vertical pole.
-
Lock the banner in place.
 X-Frame
Part One: Frame
-
Remove frame apparatus from the carrying case.
-
Extend all prongs like the arms on a drone.
-
Pull the bottom three legs out and extend the poles forming a tripod.
-
Lock tripod legs in place.
-
Extend the top two legs forming the X shape.
Part Two: Banners
-
Remove your custom Banner from its banner holder sheath.
-
Attach the top of the banner to the top of the legs that form the X.
-
Gently roll down the banner.
Versatile Banner Stand
Part One: Frame
-
Remove frame apparatus from the carrying case or box
-
Slide the lower bracket on the larger of the two poles
-
Attach larger pole to the base with included bolt and allen wrench
-
Slide smaller pole into the larger pole with the hollow end being inserted
-
Use supplied thumbscrew to set the height of the pole
-
Add the top bracket using the supplied bolt and allen wrench
Part Two: Banners
-
Remove your custom banner from its banner holder sheath
-
Insert dowel into the top sleeve of your banner
-
Insert banner dowel into the top bracket of the banner
-
Adjust the top bracket to the banner for even tension
-
Insert the bottom part of the banner into the bottom bracket
Lind Banner Frame
- Gather Tools (Tape Measure, marker, sharp implement, screws, power drill, leveler, and optionally a ladder or step ladder)
- Install the frame to the wall with the drill and screws
- Install the banner into the frame using the springs inside of the frame
- Install the covers around the banner
Conclusion
At Banners.com, we have banner stands for all different kinds of sizes, shapes and applications. From outdoor retractors with their ability to quickly be set up and put away to the Lind Banner Frame system that uses springs and covers to display your banner perfectly every time.

Video Marketing Specialist
Colton was born and raised in the great state of Minnesota, just as a lot of the Banners.com employees hail from the northern state. From a very young age, Colton became incredibly interested in filmmaking. He wanted to be the driving force behind the stories that we all love and adore. He graduated from Alexandria Technical and Community College with a degree in business management. Colton’s interests include film, horseback riding, writing, video games, YouTube videos, digital marketing, MEMES, Broadway productions, and of course, signage!