How to Order Banners Online: Upload a File
Step-By-Step Instructions for Ordering Banners Online By Uploading a Print-Ready File
There are three ways you can order products online at Banners.com: Browse Templates, Upload a File or Work with a Graphic Designer. We'll show you how to use the "Upload a File" method for our most common product, Full Color Vinyl Banners. For best results, please create an account prior to starting your order to save steps in the checkout process.
Step 1: Choose Size and Quantity
The first step is to choose your product's height and width from the drop-down menu. You will then select the quantity that you need.

Step 1: Choose Size and Quantity
Step 2: Choose Your Add-Ons
The second step is to select which product options you want your banner to have. The standard finishing is heat welded hems and grommets, but you can also get 2" or 3" pole pockets, reinforced hems, and reinforced corners.
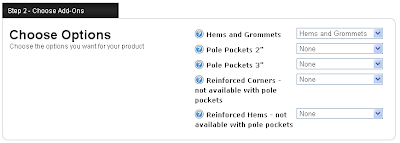
Step 2: Choose Add-Ons
Step 3: Upload a File
You will need to click on the "Upload a File" button.

Upload a file
This will bring up a pop-up window where you will be able to browse your files to select your banner file. Acceptable files are .ai, .eps, .pdf. or a high resolution .tiff or .jpg file. Files should be less than 100 MBs.
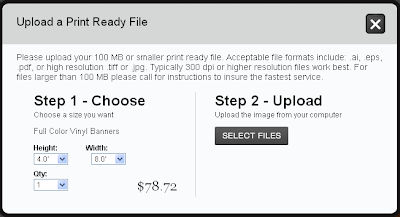
Upload a Print-ready File Pop-up Window
Step 4: Online Designer
Once you have uploaded your file, you will be taken to the online designer to make sure the file looks correct. You will still be able to add text, clip art, upload images and add backgrounds in this step. Once you are done with your design click on the "Accept Design" button located at the top or bottom of the designer.
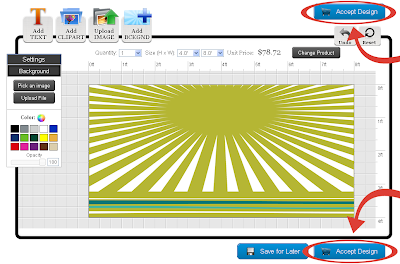
Step 4: Online Designer
Step 5: Product Options
The next step is a review of your product options. You will be able to change the quantity of banners and edit any of the options you selected. You will also be able to select your production time and add any additional information about your order. There is also a check box where you can select whether or not you want to get a proof from a customer service representative. If you select the box, you will receive an emailed proof of your order which you will have to approve via email before your order goes into production. When everything looks correct, click on the "Add to Cart" button.
.png)
Step 5: Product Options
Step 6: Shopping Cart
In the shopping cart, you will still be able to edit the quantity, edit the design and remove any unwanted products from the cart. You will also be able to apply any promotion codes. Once you enter your shipping zip code, you will be able to see the UPS shipping options available. Click on the "Proceed to Checkout" button when you are done.
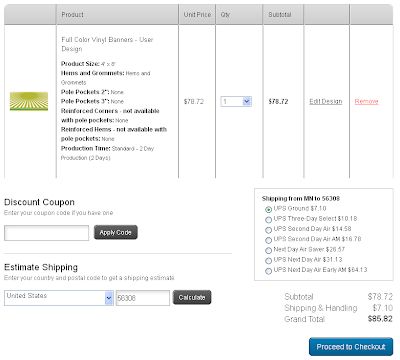
Step 6: Shopping Cart
Step 7: Billing and Shipping
You must fill in all the information on the Billing and Shipping page in order to proceed. You can either pay with a credit card or with a check. Once your information is complete, click on the "Review My Order" Button
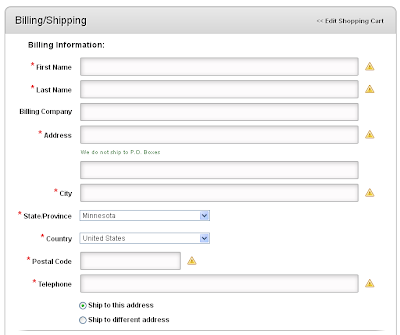
Payment Method: Credit Card
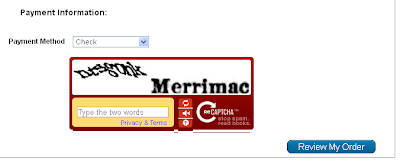
Payment Method: Check